A meditation light that follows my breath
Earlier this year during the long drive from MA to Atlanta, I listened to the audiobook for 10% Happier by Dan Harris. I used to think meditation was a silly exercise, but this book shifted my perspective. I came to find that meditation really helped with soothing my overstimulated grad student brain. I formed a regular meditation routine of sitting on a rock overlooking a grassy field. With my eyes closed and a breeze in my face, I could be convinced that I was sitting on a mountain summit. I liked to imagine that the sounds of birds chirping overhead represented all the different thoughts running through my head.

Alongside this personal journey, I received access to a Phillips Hue Go and Bridge through my research lab. I’d never used a Phillips Hue product before, so outside of the research I had fun playing with the different configurations, making my room glow various colors using my phone or voice.
Notably, under the “Hue Labs” section of the mobile app, I found a “meditation lights” formula that would make the light rhythmically increase and decrease in brightness to help guide your breathing. With my newfound meditation skills at the ready, I tried it out and found it to be a compelling experience. Even with my eyes closed, I could sense the room growing bright and dim, which forced my brain to focus on my breathing.
There was just one small issue—I don’t always breathe at the same speed, especially if I’m in the process of relaxing. Within the app, I could specify certain parameters such as the color and the duration for breathing in or out, but I found myself constantly breaking focus to fiddle with these settings on my phone as my breathing slowed.
Wouldn’t it be nice if the light could dynamically follow my breathing speed, instead of me trying the match the light? Thus began an experiment.
Sensing my breath
I want the brightness of the light to map onto how much my lungs are filled. When I breathe in, my chest expands, so one simple way to monitor my breath is by wrapping something around my chest and measuring its tension. Some googling for “respiration sensor” indicated that this is a reasonable approach.
I found an affordable stretch sensor for sale on Adafruit, but I’m a lazy/cheap college student, and I don’t want to spend money on specialized equipment.
DIY tension sensor
That’s when I stumbled across this video by DavidHuangLab which blew my mind.
That’s right, you can build a functioning tension sensor using just a pencil and a piece of string. That’s some MacGyver shit right there.
For those who don’t want to watch the video, you make it by coating a short segment of the string with graphite powder from the pencil. You really need to coat it well, so unwind the string fibers to expose all the little threads inside. When you’re done, twist it back up. Then, all you do is measure the resistance across the coated segment.
The principle is that since graphite conducts electricity, it allows current to flow through the string. When you put tension on the string, more of those graphite particles come into contact, and the electrical resistance decreases. Low resistance indicates high tension, high resistance indicates low tension.
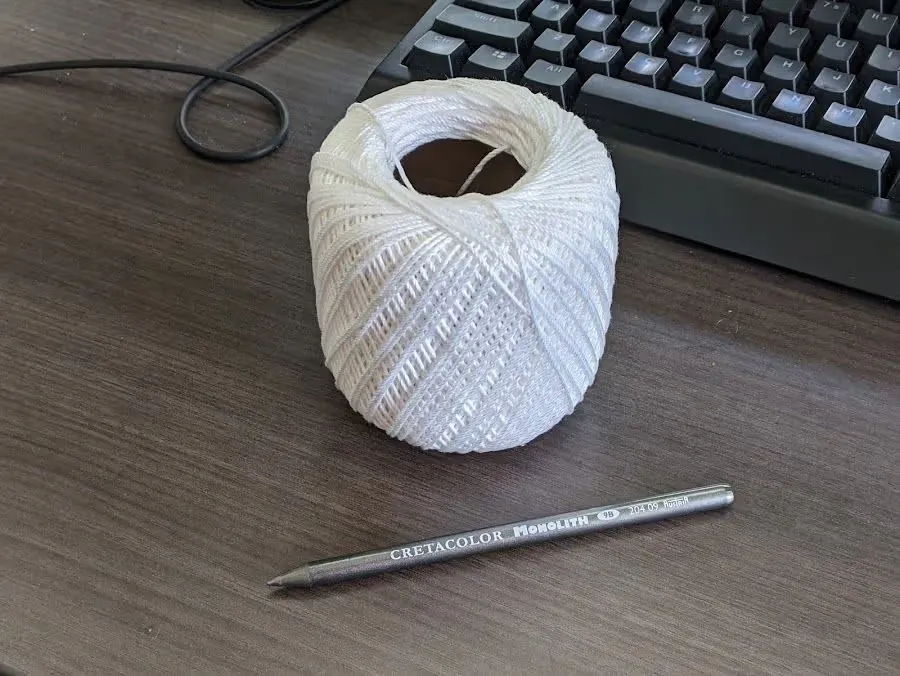
Confession: I did end up spending money at this point to buy some string and a soft pencil, but come on—A DIY sensor sounds too cool to resist. Plus, I can use those materials for other purposes. I found a very soft 9B “woodless pencil” at my local art supply store, and cotton string at Walmart.
To my amazement, David was right. After testing (and breaking) a few of these stringy bois, I found that with a heavy dusting of graphite I could achieve resistance values around 70 kΩ without putting too much stress on the string. The lower you can get it, the better. This cheap string will eventually snap under too much tension.
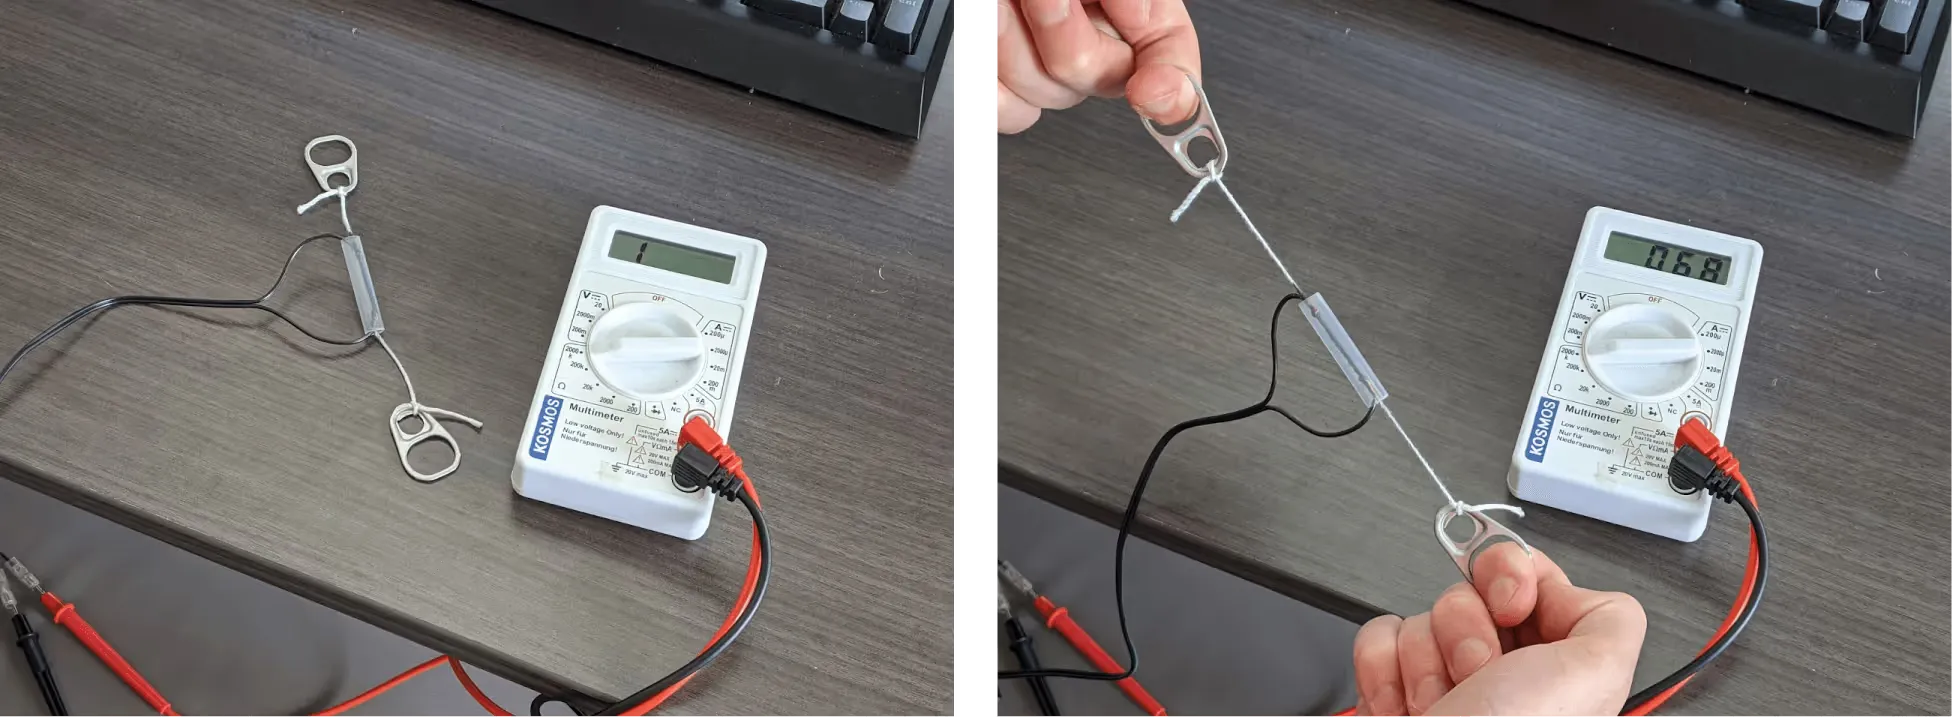
Per David’s suggestion, I used a plastic straw to protect the graphite from rubbing off. I also repurposed a couple pull tabs from cans I found in my recycling bin to act as anchor points on each end of the string.
Chest mount
Now that I had a tension sensor with some loops, I needed to affix it inline around my chest. I took an elastic drawstring from an old pair of sweatpants and tied an adjustable loop on each end using a taut-line hitch. I attached a binder clip to each loop, with the metal handles acting as durable anchor points. I hooked one end of the tension sensor into one of the binder clip handles. With this wrapped around my chest, I could close the loop by hooking the loose ends together with a C-shaped piece of metal (a carabiner would be preferable). Considering I designed most of this at 1am out of random scrap materials I found in my room, I’m pretty proud of it.
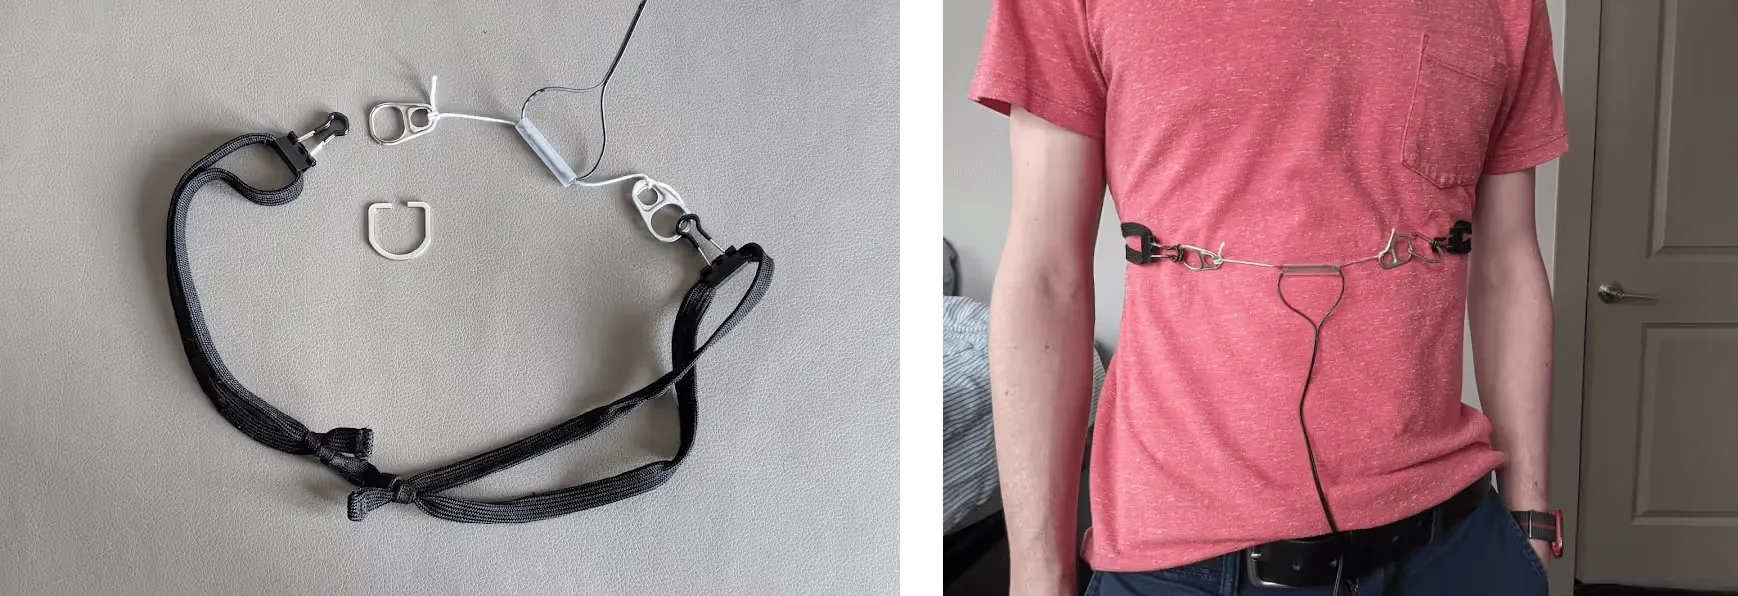
The elastic provides some additional insurance against the string snapping, and makes the device more comfortable to wear. The adjustable knots also help with this.
Controlling the light
Phillips Hue lights are fairly easy to control using the Bridge. The Bridge comes with a built in REST API accessible to devices on the local network. I’ve had a couple of knockoff ESP8266 development boards collecting dust in my drawer—very cheap boards that support Wifi, great for simple IOT projects. These days you don’t even have to set up a local development environment for them thanks to the Arduino Cloud Editor.
I started with some fetch() calls in my browser console for the initial setup
and API exploration. Here’s a sample of what one of those fetch calls looks
like:
      // Turn the light on with maximum brightness
fetch(`http://${BRIDGE_IP}/api/${USERNAME}/lights/${ID}/state`, {
	method: "PUT",
	headers: {
		"Content-Type": "application/json",
	},
	body: JSON.stringify({
		bri: 254,
		on: true,
	}),
})
Once I knew how to change the brightness from JavaScript, it was pretty painless
to convert those web requests into code for the Arduino using the
ESP8266HTTPClient and Arduino_JSON libraries.
I recognize that Hue products are cost prohibitive for a lot of people. I certainly wouldn’t have one if not for my lab’s funding. Keep in mind that you can build a much cheaper (and more flexible) programmable lighting solution using LED light strips connected to a Raspberry Pi, as I’ve done in the past. See this tutorial for more info.
Reading tension values
The final piece of the puzzle was how to use my tension sensor to drive brightness values for the Hue API. I’m a novice when it comes to circuitry, and I hadn’t the faintest idea how to measure the resistance of my string. I mean, it’s not like there’s a “resistance” input pin on the Arduino—all you can do is measure voltage.
A brief refresher of high school physics informed me that you can use a voltage divider to determine an unknown resistance value based on measured voltage. The principle is that voltage is fixed across a power source, but it gets divided proportionally across resistors in series. If we put our unknown resistor in series with a known resistor and measure the voltage between them, we know what portion of the voltage each one consumes (i.e. what portion of resistance each contributes). That ratio along with the known resistance value gives us the unknown resistance.
Lastly, I added two buttons for capturing the low and high resistance values so I could get a normalized tension factor to control the brightness.
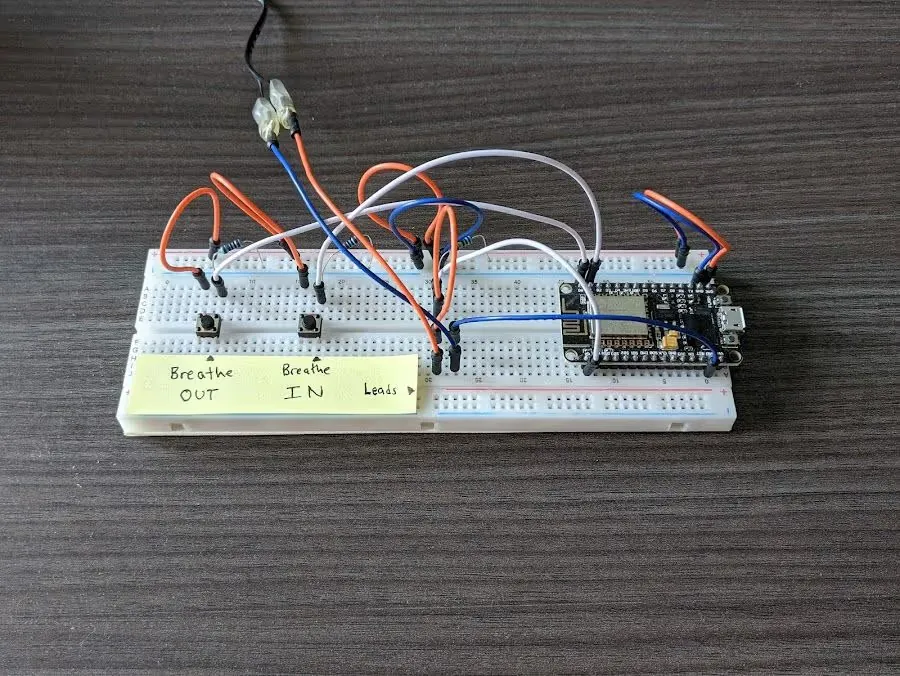
The full code used for the Arduino is available in this Gist.
Conclusions
Check out the demo video at the top of this post to see the prototype in action. The effect is most dramatic at night because the room gets totally dark when I breathe out. What’s nice about the Hue Go is that it has an internal battery, so you can easily unplug it and plop it next to you on a bed or a mat. I like placing it behind me, so it makes the room glow without shining directly in my face.
Overall, the code was not complicated, it just took some effort to figure out and build the physical components. Would I use this during my regular meditation sessions? Probably not. It’s fun to mix things up once in a while but it’s a bit intrusive. You might think that wearing a band around your chest makes it hard to breathe, but this was stretchy enough to not be uncomfortable. Still, it’s a little awkward to wear, and I had to adjust it a few times during usage. I think if I devoted a bit more of a budget to materials for this chest strap, it would be more secure and comfortable.
The tension sensor isn’t the greatest. It’s reasonably responsive, but the signal is noisy and sensitive to movements unrelated to breathing. I added in some heavy damping to mitigate much of the noise, but even so I noticed the light softly flickering if I didn’t really focus on breathing out all the way. I’ve since found a couple of other approaches to DIY respiration monitors which might fare better.
I’m glad I learned about the graphite trick as well as some principles for voltage dividers. I feel slightly more prepared for future physical computing projects now.